
A few months ago, I made a homemade plyo/box jump (video here). It has served me well, especially as all the wood was essentially scrap. However, it took up a lot of space in my shed, is not waterproof and is limited to three sizes (16", 20" and 24"). So I set about coming up with something new that would be waterproof (stored outside) and provide many height options.
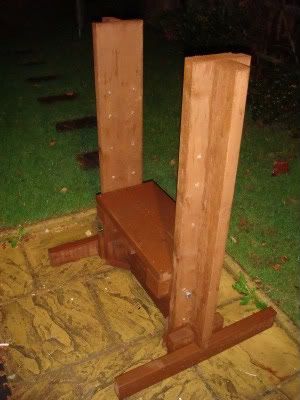
Here is the finished article!
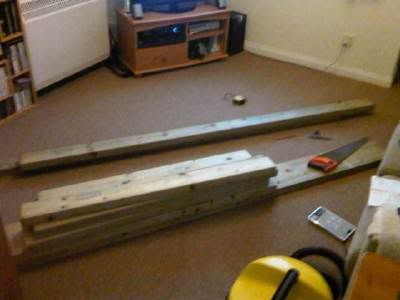
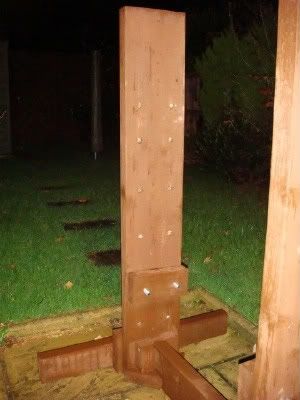
First thing to get was some treated exterior grade wood - some 2x4, 2x6 and 2x8, as I wanted it to be built like a tank!
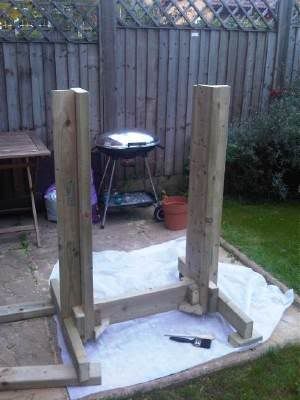
A frame was then constructed. The uprights are 50" tall 2x8, with 2x4 attached at 90 degrees to minimise flex. The bottom bit connecting the two uprights is a piece of 2x6 measuring 24". Where the uprights connect to the bottom, there is a mish mash of small pieces of wood which I kind of made up as I was going along but it seems to work! There are then two bits of 2x4 that act as lateral supports to minimise rocking. All attached using exterior wood glue and 3" decking screws. The frame looks like this:
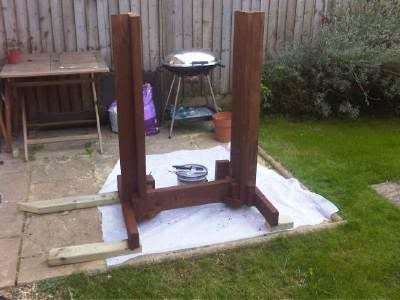
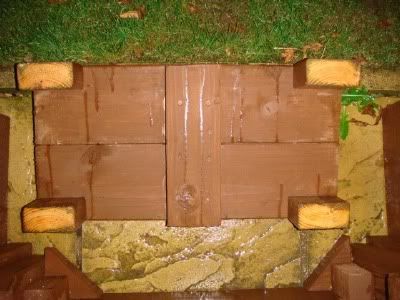
After two coats of fence/shed preservative it looks like this:
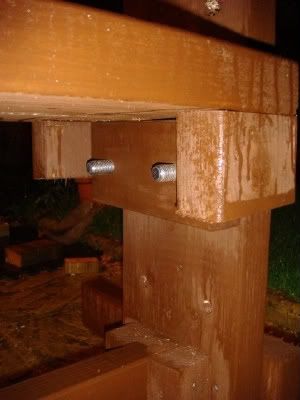
On each upright there are 16mm holes drilled on both sides, to allow two M16 bolts to be passed through and attach to a 8" piece of 2x4. This acts as the support to hold the platform in place. The fit is so tight at the moment that it doesn't require a nut to hold in place, but I have purchased some in case:
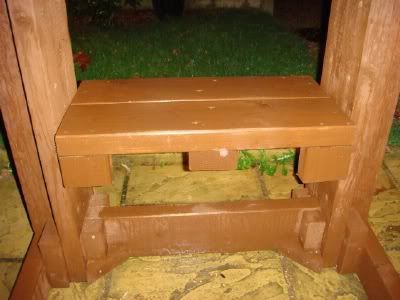
The platform is constructed using two 24" pieces of 2x6, attached/held together by a 12" piece of 2x4. In the corners are small offcuts of 2x4, spaced 8" apart:
This allows the platform to literally just sit like so:
In place the platform looks like this - which makes up the jumping surface:
So there it is. This cost me approximately £50 to construct, most of which was for the wood, some money for the bolts/nuts and some money for the preservative. I already had the wood glue and screws from earlier projects. It currently lives outside on my patio (raised up on four small bits of 2x4 to stop it from getting damp underneath) and is holding up well.
To date I have drilled up 6 heights - 12", 18", 24", 30", 36" and 40". Theoretically it can go upto 50" (yet to be tested) and I can add new heights in between as needed by simply drilling two holes on each upright.
Below is a video showing it in action:


4 comments:
Sell me one for £100
Could you post an indicatiion of what length of wood you bought? the 2x8 and 2x6 lengths needed are indicated in the text, but the 2x4 aren't.
@Shane - wish I had the time to make more!
@Koen - the 2x4 support pieces to stop it rocking back and forth are 30" long. From what I remember I had:
1 x 3.6m 2x8
1 x 2.4m 2x6
and a fair few 2.4m 2x4 lengths, some of which I already had so I can't remember off the top of my head.
However, rather than this being a how to guide, it was more to show one method of making an adjustable box, something I struggled to find over weeks of googling!
Looks like over a year old how has it held up - did bolts bend from repeated use - looks cool - I think I will build one - only thing I would add non slip tape on top keep me from wiping out - thanks for idea
Post a Comment